

![How to Grow Weed [2025] | Full Cannabis Growing Guide](http://www.ledgrowlightsdepot.com/cdn/shop/articles/The_ultimate_guide_for_growing_indoors_in_2025_519e51c8-17ef-438e-8fec-c142869c386a_1377x775_crop_center.jpg?v=1744479581)
How to Grow Weed [2025] | Full Cannabis Growing Guide
How to Grow Weed: The Ultimate Guide for Growing Weed Indoors in 2025

When weed was first legalized, cannabis users were stoked to be able to go to a dispensary, see all the different strains in one place, and choose from a variety of products, from pre-rolls to gummies to straight-up ounces of OG Kush.
At first, the experience of shopping in a dispensary was exciting because of its novelty; however, the realities of the industry quickly sunk in. The average cannabis enthusiast was dramatically overspending on weed products with high taxes, subpar quality, and questionable production processes.
In 2025, things are different; the growing revolution is expanding. More and more people are learning how to grow their own quality buds using grow tents & LED lights, free from pesticides and other harsh chemicals, and saving thousands of dollars in the process.
If you want to join this revolution, grow higher-quality and cleaner weed, save money, and become self-sufficient, read on as we explain how to start growing weed indoors in 2025.
Recommended Seed Banks: Get seeds from trusted sources like Seed Supreme and Homegrown Cannabis Co.
What You Need to Get Started
This guide isn’t for everyone. Many people think, “Oh, I should start growing weed. It will be super easy, and I will have an insane amount of weed to enjoy in just a few weeks with little effort”. Think again.
Although growing has become much more streamlined, with high-quality, genetically selected seeds that can grow in less-than-ideal conditions and plenty of resources and information available to help you, growing still requires a little money, time, and patience.
However, if done correctly, your investment can provide an exponential return to satisfy your needs for a long time.
Before we start, we need to check some boxes regarding our assumptions about you, the reader.
Does this describe your situation?
-
Do you live in a state, province, or country where it is legal to grow cannabis?
-
Do you want to grow high-quality buds indoors?
-
Do you have a quality grow tent ready?
-
Do you have plenty of space to set up the growing area?
-
Have you created a budget?
If you have answered yes to all of these questions, then you are ready to start shopping for the seeds and equipment you will need to get started.
Here are the basic materials and equipment you will need:
|
Product |
Estimated Price |
|
$270 - $2,000 |
|
|
$30 - $150 |
|
|
Total |
$300 - $3150 |
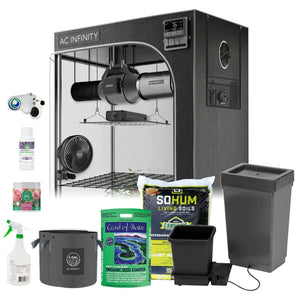
When first starting, investing in the right seeds and an all-in-one grow tent kit is a good idea. Also, by choosing an all-inclusive growing supplier like LED Grow Lights Depot, you cut out a lot of the unnecessary time it takes to shop for all the various items (LED lights, ventilation, tent, structure, etc.) and get one affordable package for all of them.
Here are ten steps to growing weed indoors, from choosing the right seeds and equipment to ensuring proper lighting, watering, and harvesting techniques.
Step 1: Choosing the Right Seeds

To learn how to grow weed indoors, you will first want to start by ensuring you are working with fire seeds that have great genetics. Keep in mind that not just any cannabis seeds will do. Here are the types of seeds you will find that produce results.
-
Feminized seeds: Almost guaranteed to grow female plants. Feminized seeds are cannabis seeds bred to produce only female plants. Since only female plants produce buds, feminized seeds eliminate the need to identify and remove male plants, which can pollinate females and reduce bud production.
-
Autoflower seeds: Streamline the process of flowering regardless of your lighting cycles. Autoflower seeds are cannabis seeds that grow into plants that automatically transition from the vegetative stage to the flowering stage without changing light cycles. Unlike photoperiod plants, which require specific lighting schedules to trigger flowering, autoflower seeds bloom based on age, typically within two to four weeks after germination.
-
Regular seeds: Can grow male plants—best for breeders and deal hunters. Regular seeds are natural cannabis seeds that have not been genetically altered to ensure a specific gender. These seeds can grow into either male or female plants, typically with a 50/50 chance. They have more breeding potential for creating new strains, stronger genetics, and a natural growth cycle.
-
Beginner seeds: These seeds are primed for easy growth, high resistance to errors, and high yields. Although "beginner seeds" isn't an official category of cannabis seeds, the term generally refers to cannabis strains that are easy to grow and resilient to mistakes, making them ideal for first-time growers. These seeds resist pests and mold, have a shorter growth cycle, don’t require light adjustments, and produce a high yield with relatively easy maintenance.
For high-quality seeds in any of these categories, we recommend Seed Supreme and Homegrown Cannabis Co. They offer premium strains with strong genetics.
In addition to choosing premium seeds with strong genetics, you must select the right cannabis strain for your setup. Choosing the right cannabis strain for your growing environment and grow medium is crucial for maximizing yield, potency, and plant health.
When deciding which cannabis strain to select, do your research on each one and consider the following.
>> Check Out the Best Prices For Cannabis Seeds Here
1. Environmental Suitability
Different strains thrive in particular conditions. Factors like temperature, humidity, and airflow affect plant growth. Since we will be growing indoors, we will have complete control over temperature, humidity, and airflow; therefore, we do not need to worry so much about which strains thrive in which climates. However, some strains are specific to indoor growing because they are more compact and thrive in smaller growing environments like a grow tent.
2. Grow Medium Compatibility
The grow medium affects how plants absorb water, nutrients, and oxygen. When selecting which strains you want to grow, you will want to ensure they are compatible with your setup. Whether you use regular or living soil, coco coir, or hydroponics, and use additives such as rockwool, perlite, and vermiculite, understanding which strains thrive in your preferred medium is critical to successful growth and high yields.
3. Growth Characteristics & Yield Goals
Another factor to consider when selecting which strain of cannabis seeds you would like to work with is the growth characteristics of the plant and your goals for yield or how much weed you want or can handle from each plant.
For example, some strains naturally produce bigger buds and higher yields but require more space and specific training techniques. Also, some strains grow tall while others stay short, so shorter or more compact plants may be more suitable depending on the size of your space. Last, consider how much time you have or how soon you would like to see a harvest. For example, strains that come in autoflower seeds are better for quick harvests, while photoperiod strains offer higher yields but take longer.
>> Check Out the Best Prices For Cannabis Seeds Here
4. Ease of Maintenance
When starting your growing journey, you will want to choose a strain that is easier to grow, requires less maintenance, and is more resilient and resistant to disease. Strains requiring precise nutrient schedules and training techniques should only be reserved for advanced growers with ample experience. Choosing the right strain ensures healthier plants, fewer problems, and better results.
Step 2: Equipment Section

For growing weed indoors, there are several setup options and equipment choices to consider based on your budget, the size of your space, and your experience level. Again, if you are new to growing, we strongly recommend using a grow tent setup from LED Grow Lights Depot.
These grow tents are easy to set up, provide a controlled environment where temperature and humidity can easily be regulated, and work well in limited space.
Here is a breakdown of all your standard grow setup options.
-
Grow Tent Setup: Best for beginners and people with smaller spaces.
-
Pros: Easy to set up, easier to maintain and regulate the climate, more affordable.
-
Cons: Smaller space, smaller yield.
-
Grow Room Setup: Better for customization and more significant operations.
-
Pros: More space for a higher yield, customizable, allows for multiple strains on various growth cycles.
-
Cons: More expensive, requires expansive ventilation, environmental and climate control is more challenging.
-
Closet Grow Setup: Best for those who need to be discreet and have limited space.
-
Pros: Easy to set up, hidden, low cost, minimum equipment required.
-
Cons: Smaller space, smaller yields, limited airflow, and potential heat issues.
-
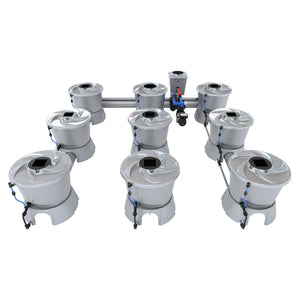
Hydroponic Setup: Best for experienced growers looking for efficiency.
-
Pros: Maximize yield and production, precise nutrient control, don’t need to worry about soil pests.
-
Cons: Expensive setup and higher learning curve.
No matter what kind of setup you select, you will require the following equipment, whether it comes complete in a prefabricated setup like with a grow tent setup or if you must acquire each piece of the equipment individually.
>> Check Out the Best Prices For Cannabis Seeds Here
Grow lights
Your grow lights are by far the most critical piece of equipment when growing weed indoors. When you don’t always have direct sunlight, you will need lights to give your plants all the energy they require to grow big and strong. Here are some different lights to consider depending on your setup.
-
LED Grow Lights: These are the best lights for home growers. They are energy efficient, full-spectrum, and generate less heat than other light types, making them ideal for indoor growing where airflow is limited.
-
HID Grow Lights: High-intensity lights used by more large-scale operations.
-
CFLS and Fluorescent Lights: These lights are cheaper, create less heat, and are best for smaller stealth grow operations.
Each light type has pros and cons, making some better than others for your specific setup. Again, if you are new to growing and decide to purchase a grow tent setup, many of these factors will be chosen for you, making it much simpler to get started.
Ventilation and Airflow
Proper ventilation and airflow are essential to growing weed because they help remove excess heat, humidity, and carbon dioxide. Without adequate ventilation and airflow, plants can develop mold, mildew, and other fungal diseases that can ruin your entire crop. Also, without proper airflow, plants may overheat or have too much or too little CO2, negatively impacting growth and development.
Here are two main pieces of equipment that growers need.
-
Inline Fans and Carbon Filters: These are required for fresh air circulation and odor control.
-
Oscillating fans: Keeps air circulating to remove excess heat, humidity, and CO2, preventing mold and ensuring plants are healthy and strong.
Temperature and Humidity Control
In addition to ensuring proper ventilation and airflow, you can make a few purchases to control your grow operation's temperature and humidity levels further.
-
Thermometer and Hygrometer: You can monitor your grow setup and quickly adjust when levels are not ideal.
-
Humidifier and Dehumidifier: You can adjust the humidity with the flick of a switch, depending on your plant's growth stage.
Grow Containers and Support
Choosing the right grow container and providing adequate support is crucial for healthy cannabis plants, proper root development, and maximizing yields. Here are some options.
Containers
-
Fabric Pots: Fabric pots provide excellent drainage and aeration for root health while preventing root circling. They are also great for avoiding overwatering issues. The downsides include quicker dry-out and the need for a tray to catch runoff.
-
Plastic Pots: Plastic pots are the most available and affordable option. They are lightweight, easy to move, and retain moisture longer. However, they have poorer aeration and require more precise watering to prevent overwatering.
-
Air Pots: Air pots foster excellent root development through air pruning while producing some of the best results regarding plant growth and yield potential.
-
Bucket Containers: Bucket containers are cheap and easy to use while fostering deep-root growth. The main downside is that they require drainage holes to be added to prevent root rot, and once the plants are growing, they can be bulky and difficult to move.
-
Hydroponic Bins and Net Pots: These bins and pots support fast and efficient growth in hydroponic setups. However, they require additional equipment, such as air pumps, and they need constant monitoring.
Support Systems
-
Trellis Netting: Supports branches and improves light exposure. Best for high-yield photoperiod strains.
-
Stakes: Bamboo or metal steaks help prevent weak branches from bending under the weight of high-density buds and high-yield plants.
-
Tomato Cages: Cages are ideal for Indica-dominant plants with wide branches, helping to maintain their structure and encourage growth.
-
Yo-Yo Plant Supports: These are perfect for indoor growers with high-yielding plants needing extra support to hold heavy colas.
Remember, you will need a combination of containers and supports to provide the stability your plants need to grow without impediment. The type of containers and supports you select will depend on the size of your grow setup, the strain of weed you are planting, and the level of airflow your plants require.
pH Meters and Watering System
To maintain a healthy pH level in your water and nutrient solutions, you must test them using a pH meter, which you can purchase online or at your local aquarium store.
Also, if you want to scale up, consider investing in an automatic water system that helps maintain consistent hydration and nutrient delivery to your plants. These systems can help reduce the risk of under or overwatering and human error.
The most common systems that growers use include the following.
-
Drip Irrigation System: This system delivers water and nutrients directly to the base of each plant through small tubes and emitters. It is ideal for soil, coco coir, and hydroponic setups. Benefits include precise water and nutrient delivery that reduces water waste.
-
Ebb & Flow System: This system consists of a large tray that the plants sit in that periodically floods with nutrient-rich water, draining back into a reservoir. It is ideal for hydroponic and coco coir setups. Benefits include fast root growth and efficient nutrient use.
-
Deep Water Culture System: This system places each plant's roots in an oxygenated nutrient solution. Benefits include fast growth, high yields, and no soil required.
-
Wicking System: This system draws water from a reservoir and delivers it directly to the roots using a wick. It is perfect for small grow operations requiring low maintenance. Benefits include a simple and cheap setup with no electricity or pumps required.
-
Gravity-Fed Blumat Water System: This system uses small ceramic sensors to automatically release water when the soil is dry. Although more expensive, it is fully automatic and requires no timers or pumps.
>> Check Out the Best Prices For Cannabis Seeds Here
Step 3: Setting Up Your Grow Space

Next, once you have chosen your setup and purchased all the required equipment, it’s time to get your growing space ready. Again, we recommend a complete grow tent kit since it is very discreet and much easier to control growing variables. An indoor grow tent kit is straightforward to keep clean and secure and helps you keep tabs on temperature, humidity, and ventilation.
Here are some important notes regarding climate control to remember.
-
Temperature: 70 - 80°F - Maintaining temperatures within this range directly impacts growth rate, nutrient absorption, and overall health. If it is any hotter or colder, you can stress your plants, causing slower growth and smaller yields. There are also optimal temperature ranges to maintain during different growth cycle stages. See the table below.
|
Growth Stage |
Ideal Temperature |
|
Seedlings Stage |
72 to 78 degrees Fahrenheit ( ~22 to 26 C ) |
|
Vegetative Stage |
70 to 80 degrees Fahrenheit ( ~21 to 26.6 C ) |
|
Flowering Stage |
65 to 78 degrees Fahrenheit ( ~18 to 25.5 C ) |
|
Late Flowering Stage |
65 to 75 degrees Fahrenheit ( ~18 to 24 C ) |
-
Humidity: ~60% for seedlings, ~50% in the vegetative stage, ~40% flowering cycle—These are the target humidity levels you must maintain at the various growth cycle stages. Remember, mold, mildew, and other fungi can grow if it is too wet. Too dry, your plants will dry out, shrivel, and crumble.
-
Ventilation: Use an exhaust fan + carbon filter to remove heat and odor and inline and oscillating fans to provide proper air and CO2 circulation.
If you do not choose an indoor grow tent as your setup, then you will need to ensure that you put together a system that provides and maintains the environmental conditions that cannabis requires to be healthy and grow strong.
>> Check Out the Best Prices For Cannabis Seeds Here
Step 4: Choosing a Grow Medium

After purchasing your seeds and equipment and setting up your grow space, your plants need a proper home for their roots. This home is also referred to as the grow medium. Let’s explore some preferred options that home growers like to use.
-
Hydroponics: Hydroponic setups are famous for fast growth and high yields. However, they are not for beginners. These systems are expensive to set up, require constant monitoring, and are at higher risk of pH or nutrient balances. When done correctly, they are the most efficient way of growing weed.
-
Soil: Nothing beats old-fashioned, good-ole dirt. Soil is natural, easy to work with, and supports organic growing and flavor-focused cultivation. It is a suitable medium for beginners because it is simple. The only downside is that soil risks pest infestation, and plants take longer to grow than other mediums.
-
Living soil: A nutrient-rich, organic mix that feeds plants naturally with beneficial microbes. This technique requires minimal feeding and enhances terpene production. Although more expensive upfront, growers looking to take a natural and more sustainable approach may find the benefits outweigh the costs.
-
Coco Coir: A natural fiber derived from the husk of coconuts, coco coir is an excellent growing medium that is reusable, retains moisture well, and provides faster growth than soil. It is also great for airflow. The main downside is that it doesn’t contain any natural nutrients, so plants will require more frequent feeding.
>> Check Out the Best Prices For Cannabis Seeds Here
Step 5: Lighting - The Lifeblood of Cannabis

Although there is no better light source to grow cannabis than the sun, when we grow indoors, we are severely limited in the amount of direct natural sunlight we can get, if we can get any at all. For that, indoor lighting systems are necessary, combined with a lighting schedule that changes throughout the different growth stages of the plants.
As mentioned above, there are several different light types to choose from; however, LED lights are the best and simplest for beginners because they are energy efficient, full-spectrum, and generate less heat than other light types.
Cannabis needs intense, full-spectrum light for healthy growth. LED grow lights are energy-efficient, long-lasting, and produce top-tier buds. Once you have procured the lights you need for your setup, you will want to put them on a timer to ensure accurate lighting intervals to promote growth.
Light Schedule
-
Seedling Stage: 18 to 24 hours per day
-
Vegetative Stage: 18 hours ON - 6 hours OFF
-
Flowering Stage: 12 hours ON / 12 hours OFF
Pro tip: Position your lights 18 to 24 inches above the canopy to prevent burning, and adjust the light height as the plants grow taller.
Lastly, if worrying about lighting and the potential for human error stresses you out, go with autoflower seeds from Seed Supreme or Homegrown Cannabis Co.
>> Check Out the Best Prices For Cannabis Seeds Here
Step 6: Watering and Nutrients

After lighting, watering, and nutrients are the most critical components for growing a successful cannabis crop. Cannabis can be a little finicky, and you never want to overwater or pump too many nutrients into the crop, which causes nutrient burn, but you don’t want to come up short, either. Cannabis requires the perfect amount of finesse regarding light, water, and nutrients.
If you are forgoing an automatic watering and feeding system, here are some quick tips regarding watering and nutrients.
1. How Often Should You Water?
A quick rule of thumb is to water when the top inch or so of soil is dry.
-
Seedling Stage: Light watering every two or three days and just enough to keep the soil slightly damp.
-
Vegetative Stage: Normal watering every two to four days, depending on dryness.
-
Flowering Stage: Normal watering every two or three days.
2. How Much Water Should You Use?
Depending on the type of container you are using, you should water your plants until you see about 10 to 20 percent of the water runoff from the bottom of your container. Allowing for the runoff prevents salt buildup while ensuring the roots are adequately hydrated.
3. Signs of Over and Underwater
Droopy leaves, slow growth, and yellow leaves are signs of overwatering. To prevent this, ensure your plants have proper drainage and water less often.
Signs of underwatering include dry, crispy leaves, wilting, slow growth, and discoloration. You will need to water more frequently, but avoid drowning the roots. Consider an automatic watering system if you are not home enough and miss watering sessions.
4. Best Water PH for Cannabis
Always use a pH meter to test and adjust water, feed, and soil conditions. Soil growers should use water with a pH level between 6.0 and 7.0, whereas hydroponic and coco coir growers should use water with a pH level between 5.5 and 6.5.
5. Cannabis Nutrient Basics
Cannabis plants require both macro and micronutrients for optimal growth. Macronutrients include Nitrogen, Phosphorus, and Potassium, and micronutrients consist of Calcium, Magnesium, Iron, Zinc, and Sulfur. Your plants require various levels of these nutrients at the various stages of the growth cycle. Ensure you find a nutrient-feeding schedule most suitable for the strain and seed type you are growing.
Also, avoid overfeeding. Start only with ¼-strength nutrients and increase gradually. Burnt leaf tips could be a sign of excess nutrients. If you see this, you must flush the soil with plain water.
6. Water and Feeding Practices
Some simple water wand feeding best practices to remember include always using room-temperature water for watering. Cold or hot water can shock the roots and cause damage to your plant. Also, if tap water is used, you should let it sit for at least 24 hours before using it. Doing so will help remove the chlorine and balance its pH levels.
Last, about a week or two before harvest, you should start flushing the plant with plain pH-balanced water to remove excess nutrients.
>> Check Out the Best Prices For Cannabis Seeds Here
Step 7: Odor Control
As we all know, cannabis smells incredibly strong, especially when it is flowering. This is because cannabis plants naturally produce a strong, pungent aroma due to their terpene content.
While the smell appeals to growers and weed enthusiasts, it can attract unwanted attention or violate local regulations of your HOA or apartment complex. Proper odor control is essential for maintaining discretion and keeping your growing environment fresh.
Consider using some or all of the following to help with odor control.
-
Carbon Filters: These work by trapping smell molecules in activated carbon.
-
Inline Fans and Adequate Ventilation: Good airflow prevents stale, smelly air from lingering. Try to have some sort of exhaust as well that pushes air outside.
-
Odor Neutralizers: Ona gel, odor absorbers, or essential oil diffusers can mask the odor outside the grow room. Never place these items inside your grow area, as your plants can absorb the odor, affecting its aroma and taste.
-
Grow Tents: Grow tents contain odor better than open spaces, and you can seal gaps, doors, and windows to prevent leaks.
Step 8: Electrical Safety
Staying safe is a priority when growing indoors. Remember the following to ensure electrical safety to prevent electrocution and a potential house fire.
-
Know your circuit limits: Overloading outlets can present a serious fire risk.
-
Use surge protectors and timers: Your lighting system should include all your lights plugged into surge protectors, and timers should automatically turn off the lights according to your lighting schedule.
-
Keep water away from electrical equipment: This seems like a no-brainer, but it can get complicated with hydroponic setups and automatic watering systems. Also, if you are manually watering, be sure not to come into contact with any electrical components.
-
Get professional help: Consider hiring an electrician if you’re running multiple high-wattage devices, scaling up your operation, or both. A professional can rig up an efficient and safe system for you, so you won’t need to worry.
>> Check Out the Best Prices For Cannabis Seeds Here
Step 9: Harvesting & Curing

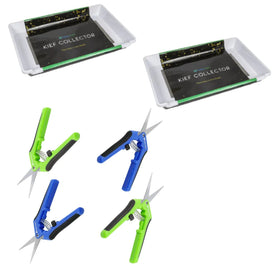
Harvesting at the right time maximizes potency, flavor, and yield. The most reliable way to determine readiness is to examine trichomes, the tiny resin glands on buds. You can do this using a jeweler’s loupe or microscope.
When 60% to 80% of the trichomes are cloudy, and 10% to 30% are amber, it’s the best time to harvest for potency. If harvested too early, buds will have lower THC and a weaker effect, while waiting too long results in more CBN, leading to a heavier, sedative high. Another sign of maturity is the pistil color. When 70% to 90% of pistils darken and curl in, the buds are nearing peak ripeness.
The timing of harvest also varies by strain. Indicas are usually ready in 7–9 weeks, while Sativas take 10–14 weeks to mature. Autoflowers typically finish within 8–12 weeks, depending on genetics.
Before harvesting, it’s essential to flush plants with plain pH-balanced water for 7–14 days to remove excess nutrients and improve bud smoothness. Some growers harvest in stages to maximize yield, cutting top buds first and allowing lower buds more time to mature.
Harvesting too early can result in weak, low-yielding buds while waiting too long can degrade THC and terpenes. Once harvested, proper drying and curing are necessary to enhance flavor and potency.
Drying & Curing
Properly drying and curing your cannabis after harvesting is essential for preserving potency, flavor, and smoothness. Drying should take 7 to 14 days in a dark room with a 60 to 70°F temperature and 50% to 60% humidity. Hang whole branches upside down or place buds on a drying rack, ensuring good airflow but avoiding direct fans. The buds are ready when they feel dry on the outside and stems snap instead of bend.
Remember that drying too fast can cause harsh smoke while drying too slowly increases the risk of mold.
Once dried, curing enhances potency and terpene profile. Store buds loosely in glass jars at 58% to 62% humidity, opening them daily for 1 to 2 weeks to release excess moisture.
After that, burp jars less frequently and cure for at least 2 to 4 weeks. Proper curing removes chlorophyll, leading to smoother, better-tasting smoke. Avoid common mistakes like drying too quickly or skipping the curing process, as both can ruin the final product.
>> Check Out the Best Prices For Cannabis Seeds Here
Final Tips for Success
Start small. Master a few plants before scaling up. Keep your grow space clean to avoid mold and pests. Be patient! The best weed takes time and care. Stay discreet. Avoid telling too many people about your grow.
With the right seeds, setup, and care, you’ll soon be harvesting your own homegrown, high-quality cannabis. Happy growing!
Need Quality Seeds?
Check out Seed Supreme and Homegrown Cannabis Co. for top-tier cannabis genetics.
Your best grow starts with the best seeds!
Leave a comment